Setup for Native iOS Applications
Adding the ZSM Client SDK to your iOS project
Note: The sample application must be built to a physical iPhone due to limitations of the Xcode Simulator.
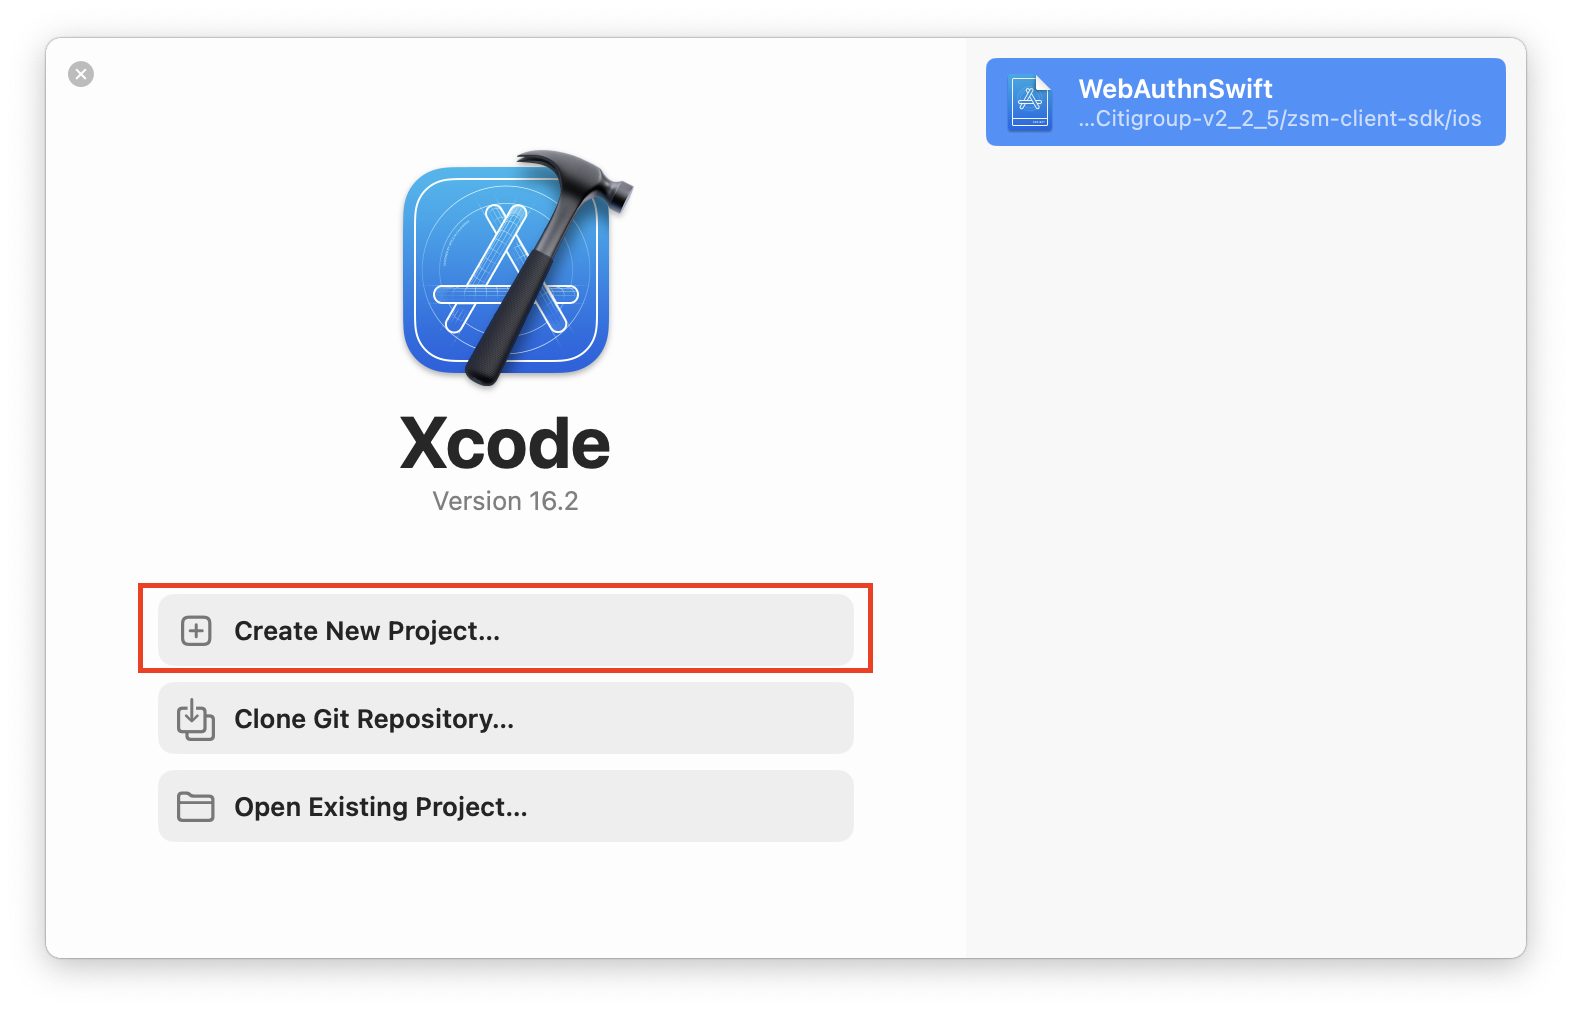
Step #1: Open Xcode
Step #2: Create a new Project
Select the topmost option from the quick launch menu. (NOTE: If working from an existing project, skip ahead to step 6.)
Step #3: Select a Platform and Template
In this case, we will prepare the project as an App intended to be run on the iOS platform. After making your selections, click the Next button to proceed.
Step #4: Name the Project
Choose any name you would like. Then, select your team (note that this is needed to perform a full build after adding the ZSM Client SDK to the project for it to function for testing purposes. Add your organization's name, and finally select the language you wish to employ. We'll be using Swift for the purposes of this example). Click the Next button.
Step #5: Decide Where You Would Like to Save the Project
Once you navigate to your desired save location in the Finder dialog, click Finish.
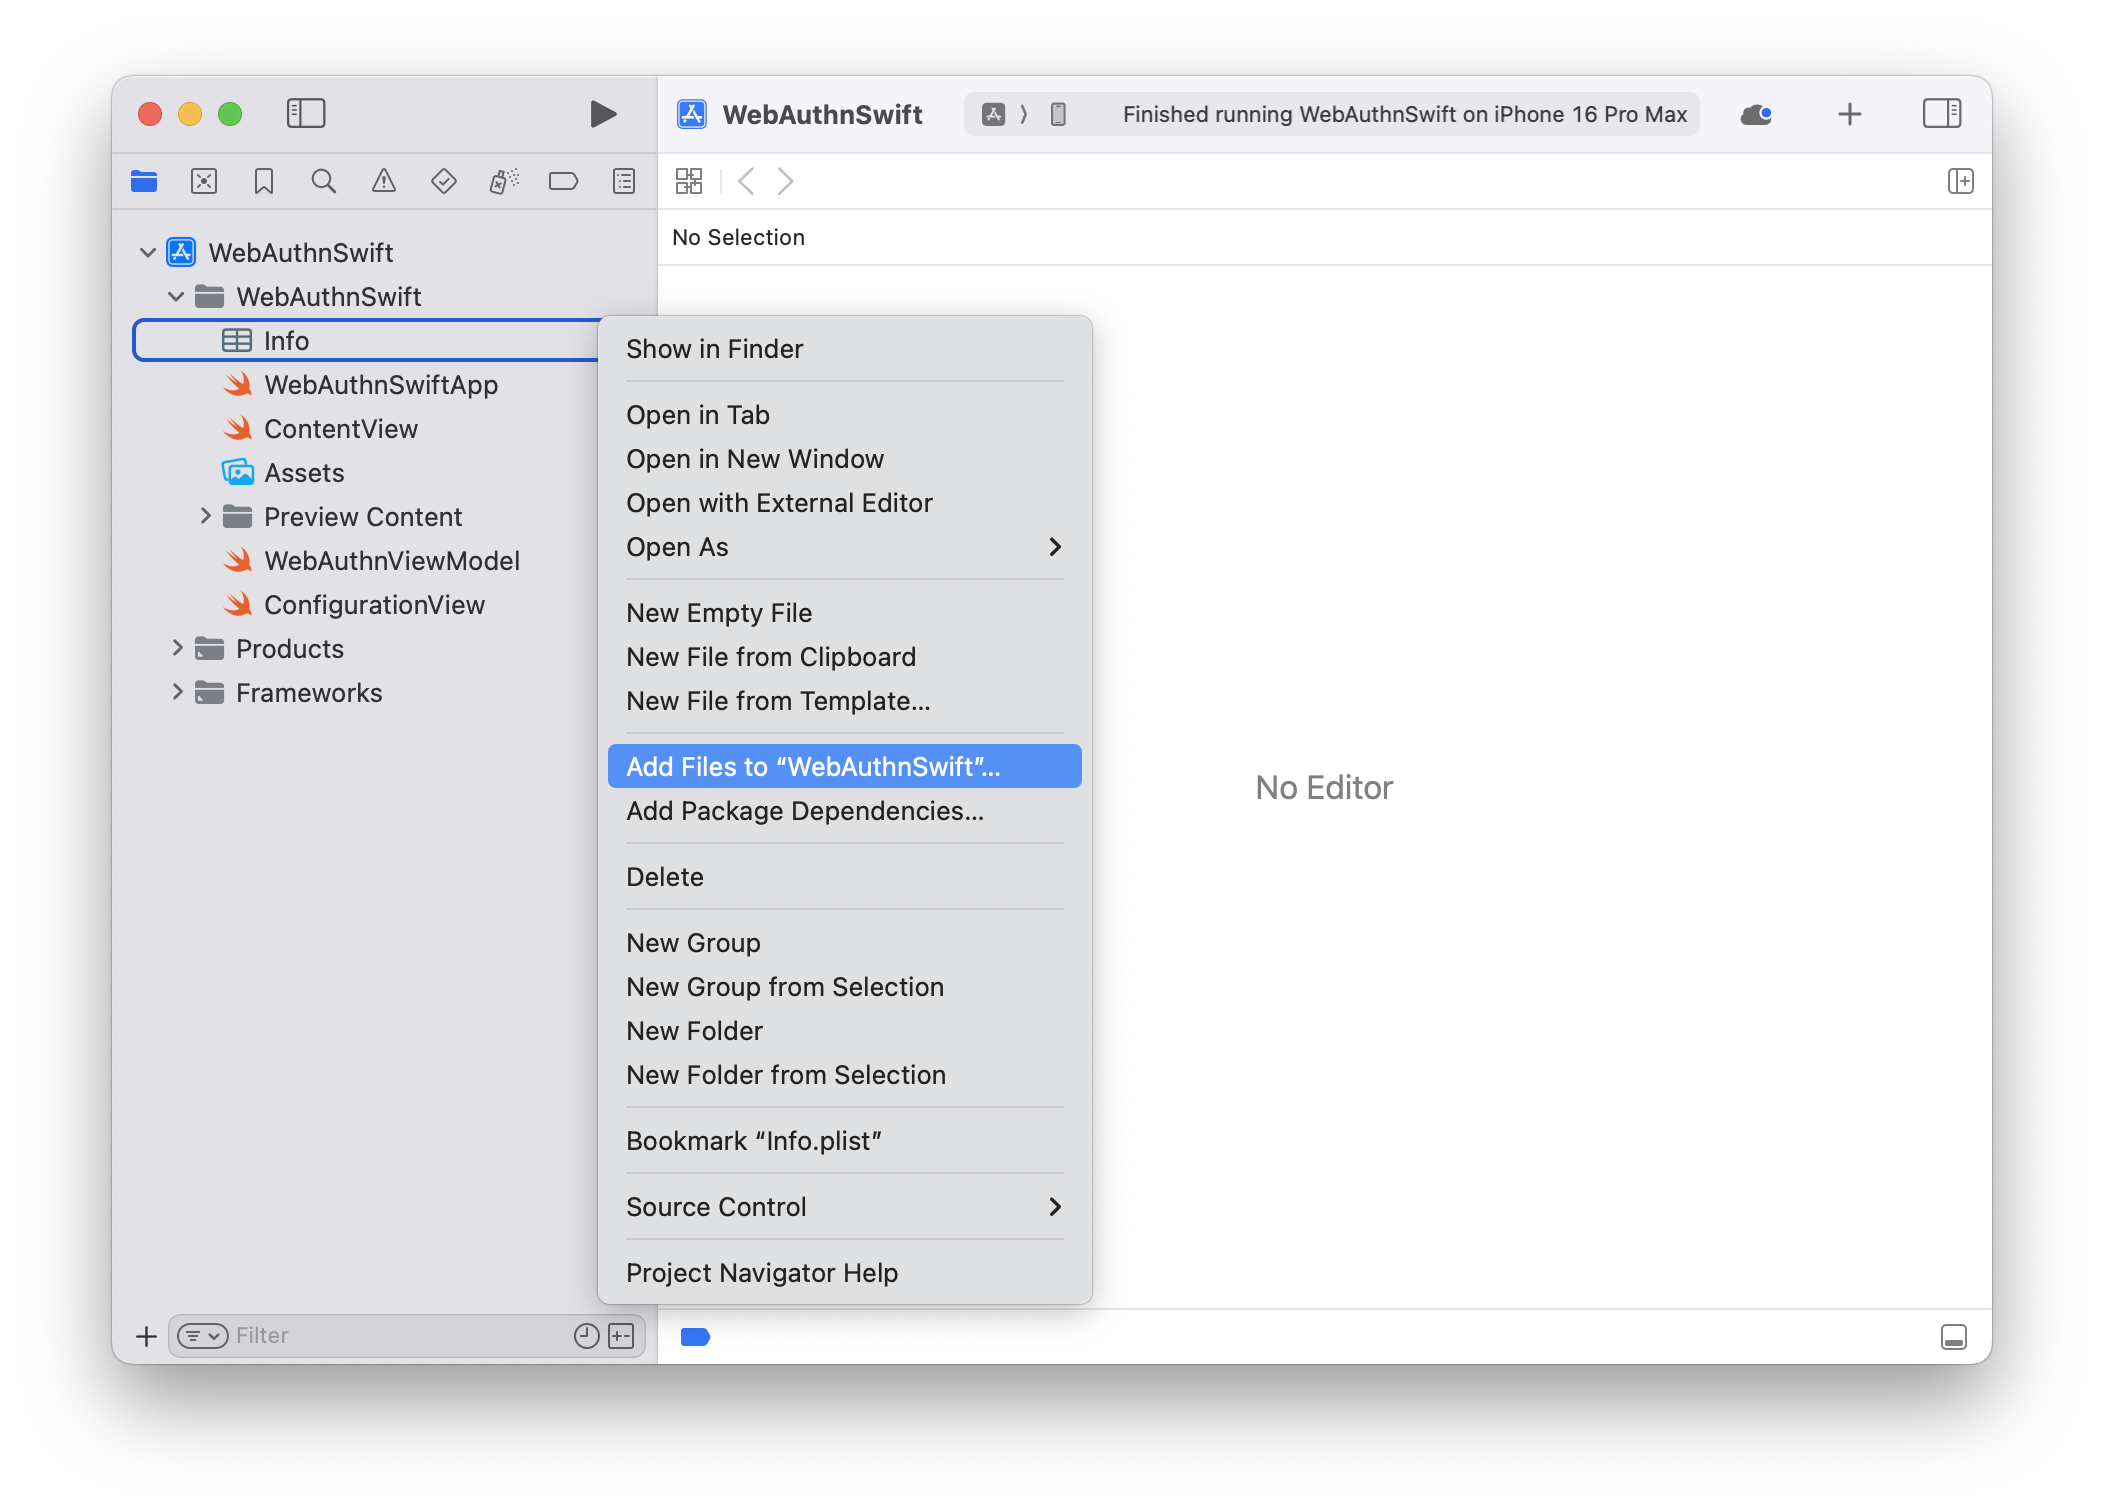
Step #6: Add the Framework to the Project
Right-click on the side panel, and select Add Files to “<YOUR_PROJECT>”
Browse to the folder location into which you saved the ZSM Client SDK and select the Framework directory contained therein.
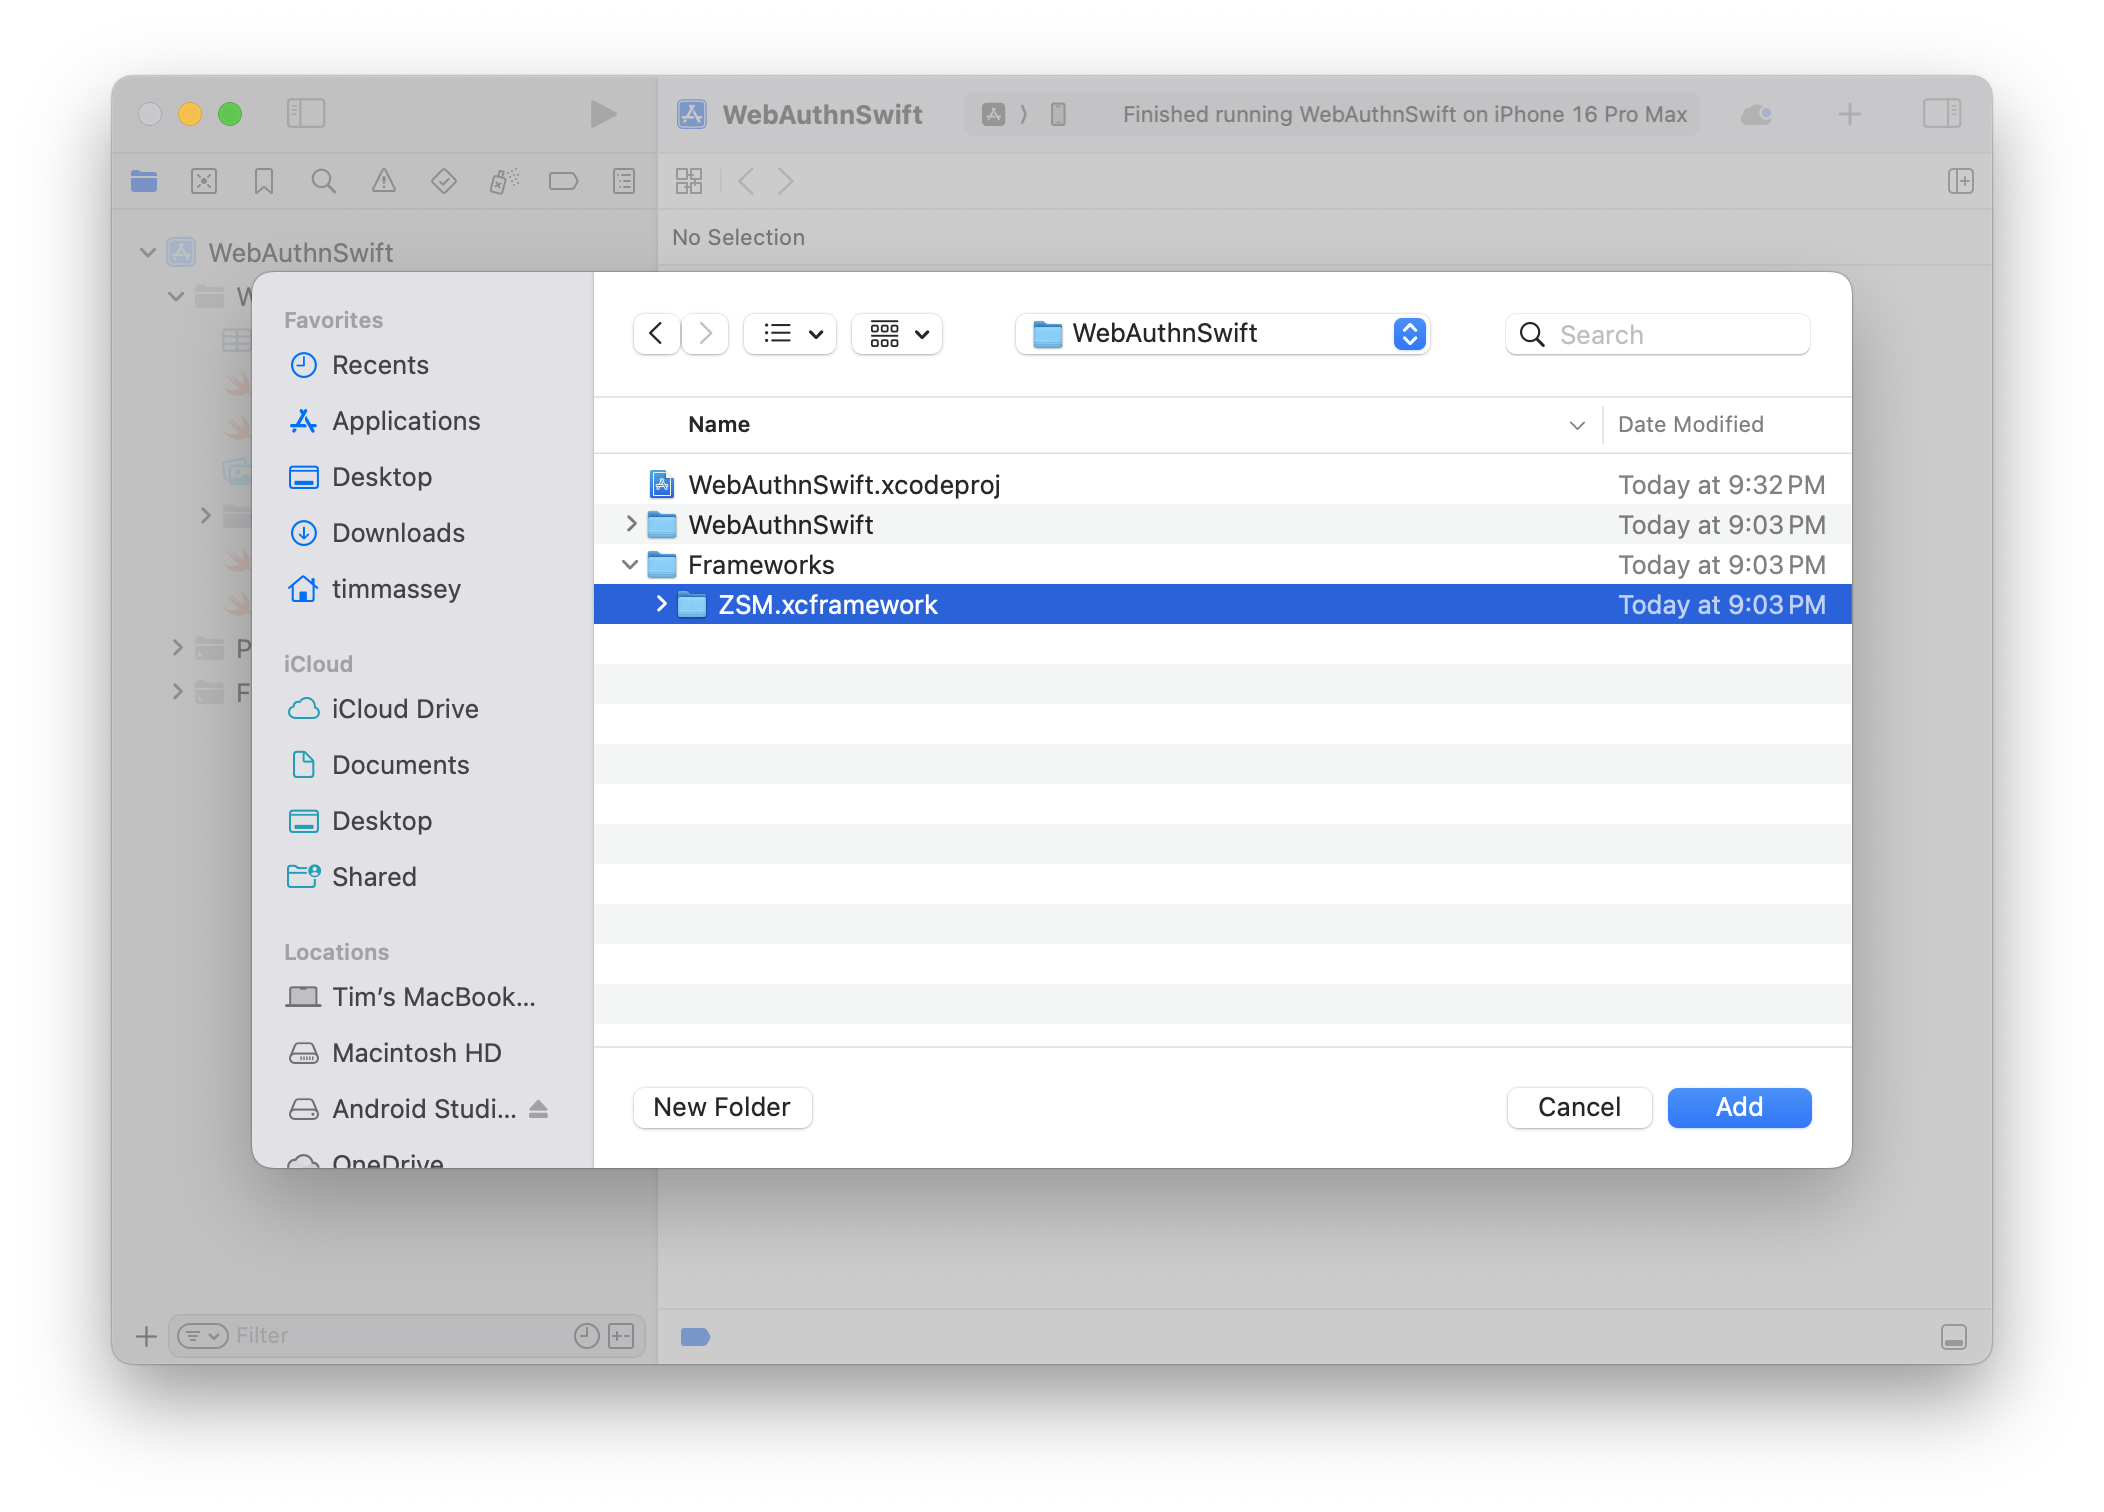
Step #7: Ensure the Add to Targets Checkbox is Selected
Optionally select Copy Items (if you're creating the project in a different location, or intend to create more than one using the framework).
Step #8: Finally, Click the Add button.
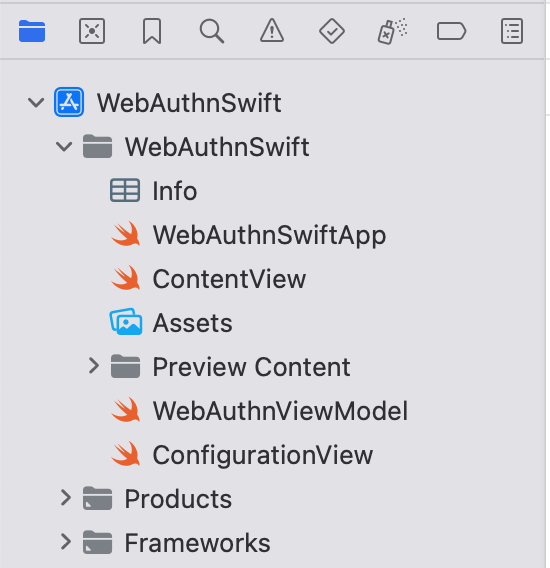
Your project structure should now resemble the following: